
Tuesday, May 22, 2018

Wednesday, January 10, 2018
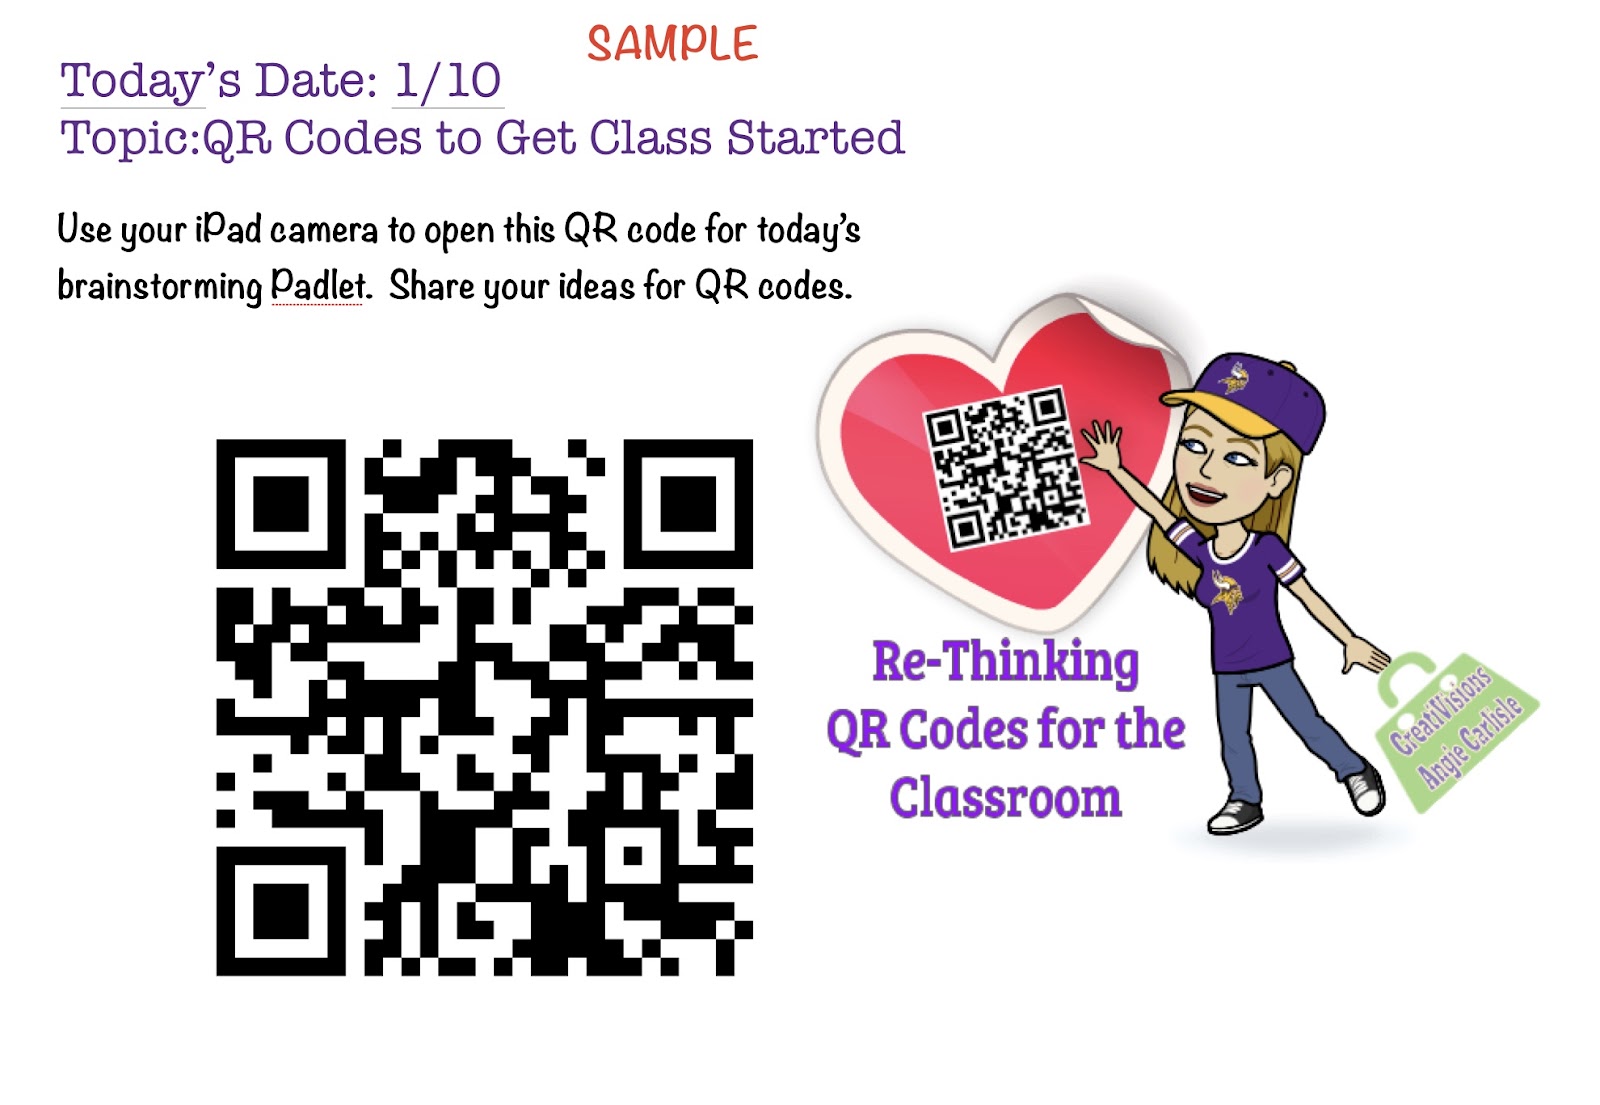
QR code Classroom Idea #2: QR Codes for a Start to Classroom Activities
QR code Classroom Idea #2: QR Codes for a Start to Classroom Activities
I don’t know about you, but a class period is way too short for me. I like my class to start immediately with a “Jump Start” activity (aka bell ringer) as students walk into my room. I do this for several reasons; I have less discipline issues, students appreciate procedures, more efficient use of class time and if I have a student I need to touch base with, I can do so while others get started. QR codes are an easy way to do this with no additional directions or teacher actions needed.
Here are a few things you could do with a QR code projected on your board as students enter your room:
- Link to a website to explore, find and list 3 interesting facts.
- A Google form: pretest, questions of the day, daily trivia, what do you wonder…
- A Padlet link for kids to brainstorm on.
- An image your want students to analyze.
Monday, January 1, 2018
QR meets Google Forms/Quizzes meets Paper.
QR code Classroom Idea #1: QR meets Google Forms/Quizzes meets Paper.
As much as I love technology, I am not willing to totally give up paper. I believe there are many times a student does better with paper. There are also a lot of ways to use a mixture of technology with paper. For this first classroom idea, I use a paper test sheet to provide students with the QR code to get them into a Google Form/Quiz. They get the score immediately on that portion of the test and then complete the short answer/essay section on paper. One of the best reasons I have found for doing the test this way is that students can only access the test when I give them the paper (no absent students taking this unsupervised anywhere). I can also easily give the sheet to students for make-up or retake tests, without worrying about leaving it “open”.
First of all, I love Google Forms and the fairly new quiz feature. If you haven’t used it, it is an awesome way to create a quiz for a student that is automatically graded (similar to Flubaroo, only all within Google Forms). There are several options regarding grading and delivery of score to the student.

Step 2: Create a QR code to send students into the Google Quiz.
A very easy way to create quick QR codes is with a Chrome Extension that automatically makes the QR code from any page you are on. Anything to QR Code is the one I use. Once you install the extension, open the Google Form. You then tap the Extension icon and “voila!”, it creates a QR code for you to use to send students directly to the Google Form.
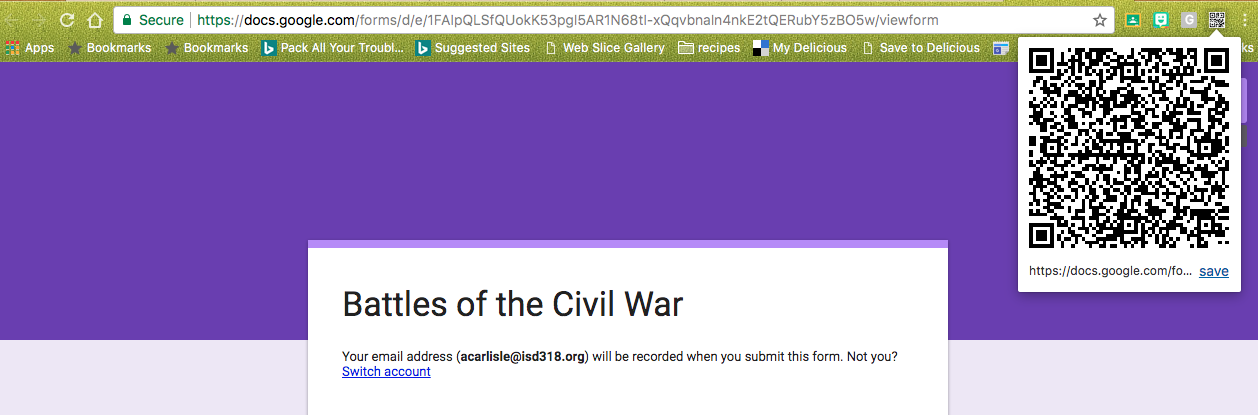
Step 3: Create the paper portion of the quiz/test. I do this for the short answer/essay section of my test. I use Google Docs. On my test, I insert an image of the QR code that will bring the students to the quiz. They can see their score as soon as they are done and record on this paper. They then finish up by writing the short answer/essay questions answers on the paper.
This has made grading very easy for me. I do confirm their scores when I grade the short answer questions, but it confirms that they see and know their score for the first portion of the test.

Creation notes:
I like delivering a quiz this way, because it guarantees no one gets access to the quiz until they are in my classroom and I am ready for them to begin (i.e. students who stayed home can not access and take the quiz unsupervised.)
I am using Google Chrome. (Otherwise you will need to use a different QR Code Generator. )
Sunday, September 24, 2017

Love Your AirDrop - 10+ Ways to use Airdrop for Efficiency in the Classroom

Just tap Share from various app’s and then select AirDrop.
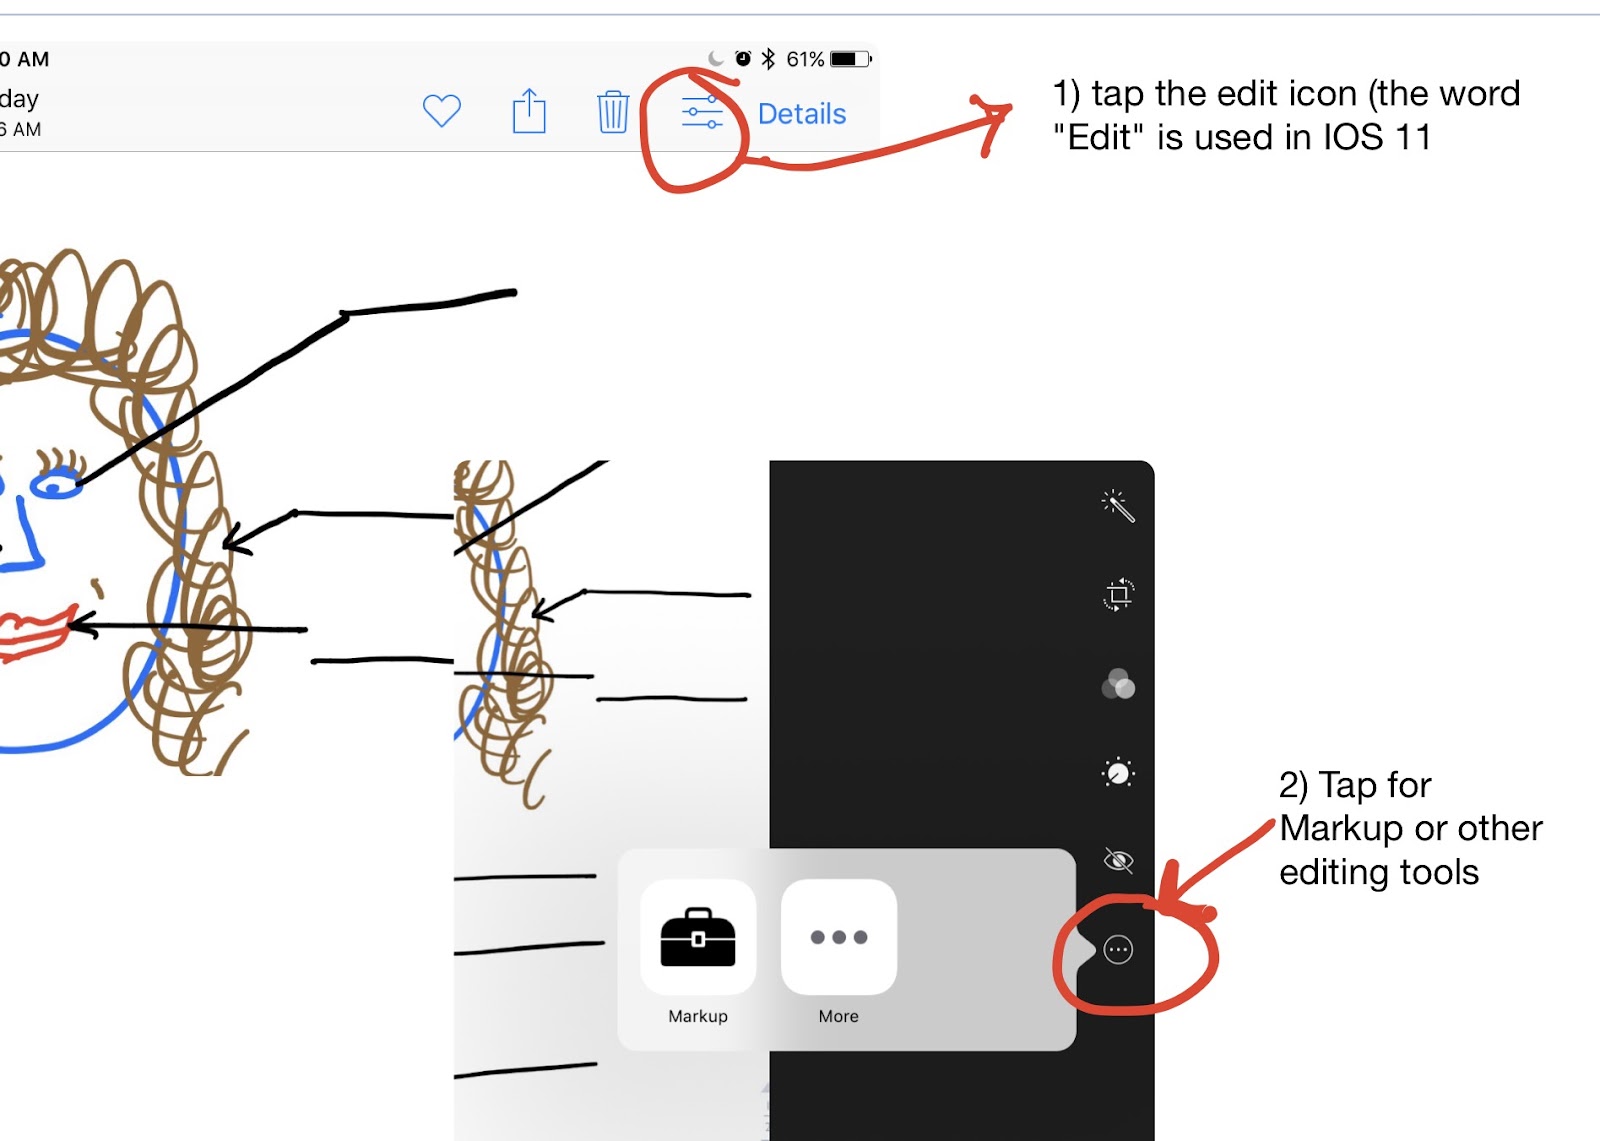
- Airdrop an assignment you create (I like to create in Google Slides or Notability) and then saved in photos You can screenshot if you create on your iPad or on if you use your computer, here are directions to save a Slide as a JPEG. Student use Edit and Markup (within photos) to complete the assignment (Directions for Photo Mark-up).
- Airdrop a PDF assignment/reading. Student use an app like Notability to complete the assignment or iBooks to save to read anytime.
- AirDrop differentiated assignments quickly to students. Number off students and then have 1’s turn on Airdrop to receive assignment 1...
- Airdrop a Note with a checklist for a project or activities for the day or week.
- Have students AirDrop you their work for quick display on your projector, using your device. (I don’t leave my projector open for students to “take over” so this way I can still quickly display work.)
- Airdrop in-class bucks/award/certificates for good behavior (or warnings for bad behavior)
- Airdrop an image you want students to be able to add into notes (such as notability) to annotate.
- Airdrop a Google Quiz/Google Form
- Airdrop a website
- Airdrop links to games (such quizizz or jeopardy labs) to students who show you satisfactorily completed work.
- Airdrop Bellwork/Jump Start activities as student enter the room.
- Airdrop photos you want to discuss.
- Airdrop your presentation/notes to students.
Additional Thoughts
- No WIFI or it doesn’t work? AirDrop DOES!! It’s a great back-up plan.
- But - Airdrop does make it really easy for students to “share” answers.
- Talk to students about appropriate use of AirDrop and expectations/consequences of cheating
- I tell students it should be turned off, unless I ask them to turn it on. I double check during tests.
- If at at possible make sure student devices are named (or numbered) to know who you are Airdropping.
**Creation Notes**
Creating assignments
I created many of the assignments in Google Slides.
You can then Download as a JPEG or PDF under the File menu.

How to use Photo Editing
How to use Photo Editing to complete assignments delivered as a photo.
Airdropping a PDF
From Email - I send the PDF I’ve created on my computer to my own email and open the attachment on my iPad.
My view after opening the attachment, to then AirDrop
Students will receive the PDF and choose how to open it.


From Notability -
From Notability
- Tap the Share Icon
- Tap Other Apps
- Tap Share Note
- Select Airdrop recipients


Monday, January 2, 2017
Keynote for Green Screen or actually “any screen”
Did you know you can use the Keynote app on our iPads to create quick and easy Green Screen Projects?
There is a tool called “instant alpha” that allows you to erase any color you swipe over. You can take, or use, any photo you want, insert it into a Keynote slide and then with the swipe of a finger, take away any color.
This actually means you don’t need to even have a Green Screen, just any solid colored background will work.
Here are the directions to an assignment I recently did in my class, using a green screen sheet and the Keynote app. The kids loved it and it was very easy. No extra app needed!
Time Traveler
This assignment will have you “put yourself” into images from history using a green screen and Keynote.

Find images you will “go to”
|
Find an image(s) from the era (time period) we are studying that you would like to “put yourself into”.
Save the image into your photos on your iPad. (Tap and hold - save image or do a screen shot)
(If you haven’t already created a folder for history class, this would be a good time to do that to keep your photos organized and easy to find)
|
Prepare your Keynote
|
Open Keynote
Create a presentation. Name it “Time Traveler”
Open a page that is completely blank by tapping the + in the bottom left corner and selecting the blank page option on the bottom left..
Insert your photo by tapping the + icon in the top right. Select your photo.
Insert text and write a caption on the page explaining what is happening in the photo, as if you were there. Include all relevant facts: Who you are with, when this happened, what is happening...
Create a page for each picture you will be creating.
|

Take your picture
|
(Monday we will do this - be prepared!! Bring props if you want/need any.)
Examine your photo and decide on the pose you will be doing to fit into the image.
Take your photo, using your iPad, in front of the green screen. You will need a partner to take the photo.
Crop the photo, using the editing tools in photos, to a small box with yourself surrounded by green.
|

Insert photo &
Erase the Green.
|
Go back into your Keynote.
Insert the photo of yourself onto the image you will be in.
Make sure the photo is selected, tap the PAINTBRUSH icon. Under the IMAGE tab - select INSTANT ALPHA. Swipe your finger across the green to erase it.
Resize and adjust your image as necessary.
|

Save your photo
|
View your keynote slide in the full screen by tapping the triangle icon in the top right corner.
Do a screenshot to save this image into photos.
Go into photos and open your image to edit if necessary, i.e. make it black and white.
Submit your complete Time Traveler photo into our class google slide
show for this era and also add it to your class “History Book”.
|
Tuesday, April 26, 2016
Think (Or Rethink) About Using QR Codes to Quickly Engage Students
QUICK START TO YOUR LESSON/ACTIVITY
It’s spring. I don’t know about you, but especially this time of year, I will try anything to keep students focused and on track. QR codes are a nice option for that.
What is a QR Code?
A QR code (Quick read code) is the barcode that will direct you to another site/resource simply by scanning or pointing the camera at it.
QR Codes work great to get the class/group started promptly with a QR image projected as students (of any age) enter the classroom. You could even have a printed QR code taped to your door. Students simply point the iPad ( or any device with a camera) at the code with a QR code reader app open (Qrafter or QR Reader both work well)
- Great for both younger and older students (including staff)
- Avoid the lost time of logins, forgotten passwords, mistyped words/web addresses….
- Avoid: lost class time, repeating directions, waiting for stragglers…
- Use it to allow for movement during your class/session.

Ideas for use:
- Today's into, Jump Start/Bell Work, essential question, images, Google of the day...
- Go directly to a presentation, Google form, website, article, PDF … (Remember anything you put into your Google drive can be shared)
- “Day/Week At a Glance” Calendar/reminders
- Review game to get started (Quizziz, Kahoot, Jeopardy Labs…)
- Humor for the day (see sample at the bottom)
- Various steps to your activity, post QR codes around your room (they can link to Google Docs with directions or activities)
- A Google form that needs to be completed when homework isn't done
- A Google form for questions students have at the end of the day.
- Exit ticket (See sample at the bottom)
- Brainstorm - as on a Padlet (See example below)
- Sub lesson - make things easy for both the guest teacher and the students. (check out this sample sub lesson plan - Which is actually a lesson about Hyper Docs)

How do Get/Create a QR Code?
- Get the web address of where you want to direct everyone.
- What if this isn't a website?
This is really easy if you use Google Drive.
- Upload your image, PDF… into drive
- Open the Share option. Share to view only (unless you want them to be able to edit your item) to anyone with the link.
- Create the QR Code - Copy the link and paste it into a QR code maker.
- The App Qrafter does this on the iPad
- www.qrstuff.com/
- Google has an add-on in Sheets
- Copy the QR code and post it.
Administrators - I challenge you to try this too.
- Have a QR code at your next staff meeting.
- Remind staff to bring their iPads (or have some available)
- Make sure they have a QR code reader installed (we push Qrafter to all district managed iPads)
- Have your agenda, a signup sheet, a intro cartoon, an interesting article…
More Samples:
Exit Ticket (this is a page at the end of the slide presentation for the day)

Humor of the day.

Padlet - Share you ideas

Monday, December 28, 2015
Cornell Notes: Note Taking Done Differently
Cornell Notes: Note Taking Done Differently
One method of note taking I really like to use with students is the Cornell method. The basic form is a two column note taking method to summarize what is being studied. You can print out a form, teach students how to create this in their notebook or share a Google Doc. I really like the Google option since it is easy to share with me or other students and it is less likely to get lost.
I've modified the original version for my classroom.
Most models include a two column note taking system. I've modified mine into three. I've also added a focus at the beginning. I like to have students use "I" statements related to the standard : "I will learn the 3 causes of ..."
They also need to restate the essential question so they have a focus point as they read or watch a video.
I give them the key concepts they will come across as they study. They can add additional ones if they choose.
I use this quite often and the students seem to do a nice job. It is easy for me to evaluate what they are actually understanding from the assigned material. I also like to let students do note comparisons with other students.
Here is the Google Doc.
Tuesday, December 22, 2015
2 iPad Tips to Make Your Teaching Day More Efficient
2 iPad Tips to Make Your Teaching Day More Efficient
|  |
There are so many things we can do with iPads in the classroom. I scarcely remember how I even taught B.i. (Before iPads). Sometimes we work so hard to focus on ways to use them with students, I think we forget that these powerful devices can make our life easier as the teacher using our device.
Here are a couple of my favorite ways to use MY iPad to make my teaching world more efficient.
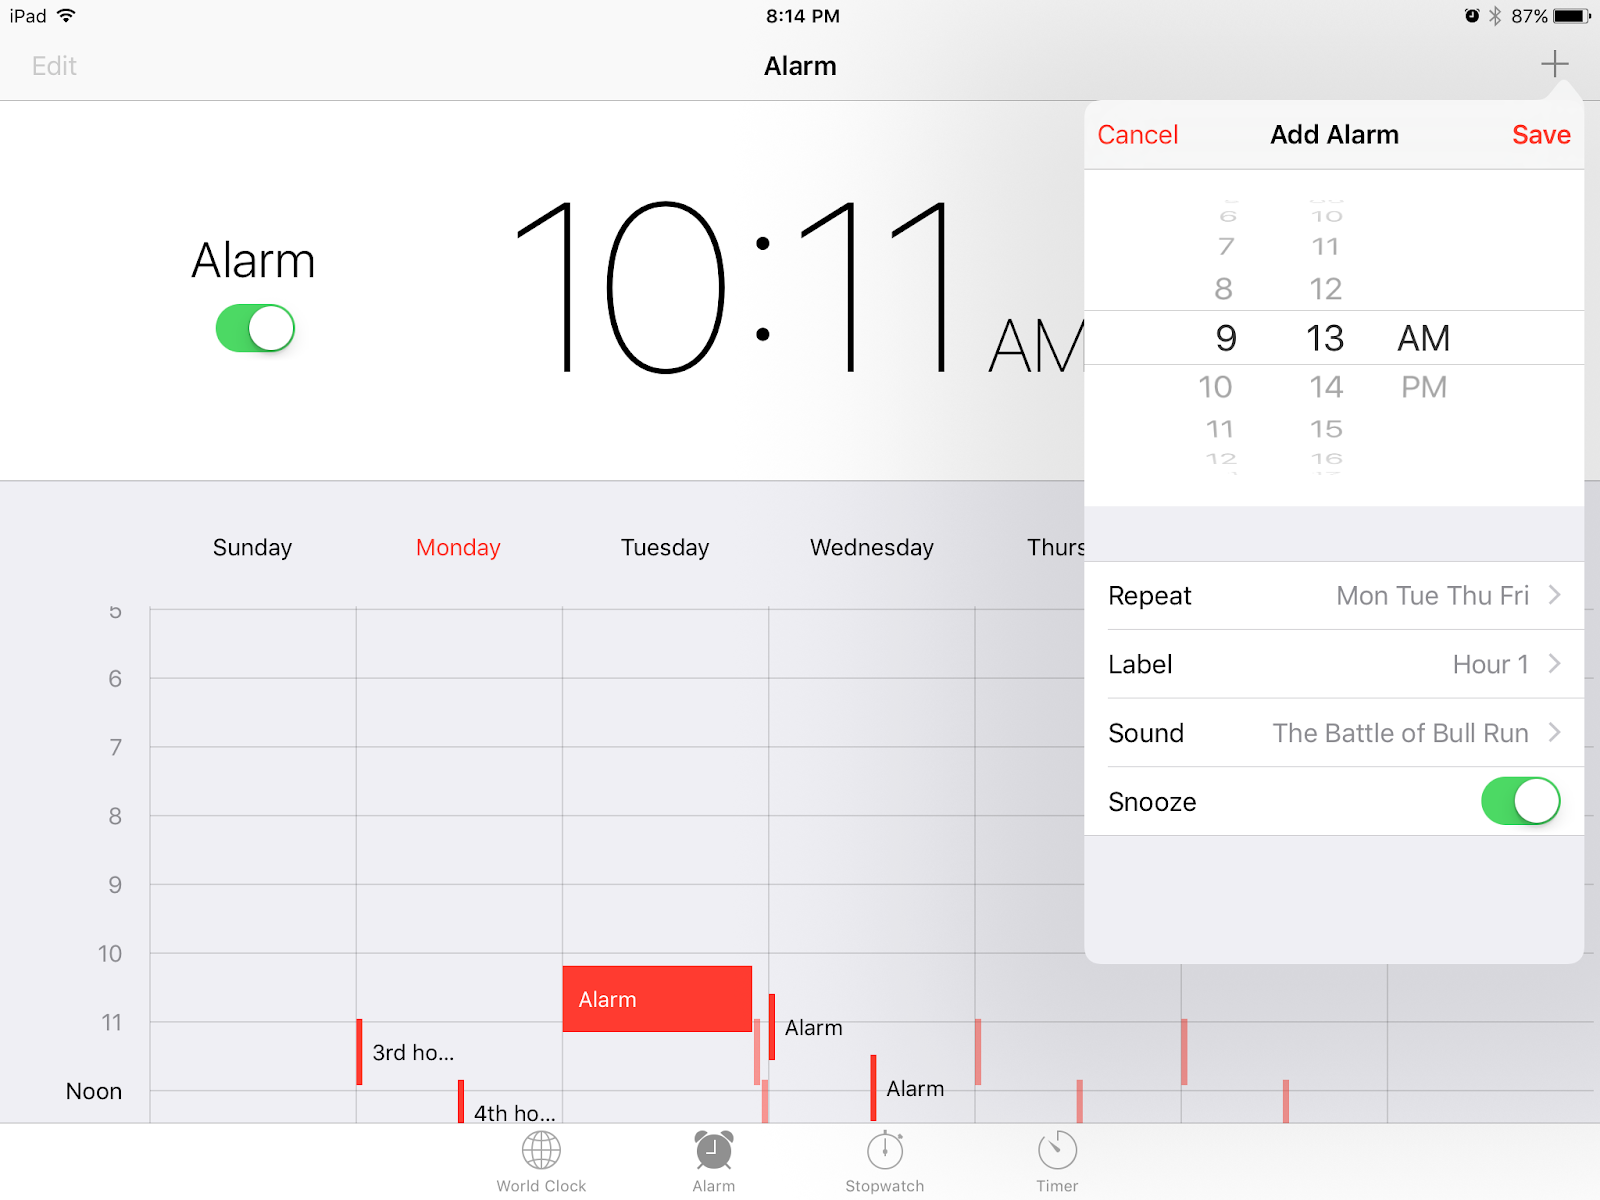
- Two Minute Warning - Set the clock for a “two-minute” warning for end of each class period. My students have become so accustomed to hearing two minute warning, they have stopped watching the clock and just wait for the alarm to go off each day. Since my class is history, I use a song from the era we are studying as the alarm.
 |
|
- Google Forms - Create and save Google Forms on your iPad Home Screen
OK - So I love Google forms anyway, let me just get that out of the way. I use them all the time, personally and professionally.
Then, add on the easy tap of a iPad icon for easy access to a form that I can use in class to do things such as track behaviors (good or bad), book sign out, library sign-out, quick grade sheet . . . the list goes on and on. Life is good.
|  |
Here are some sample forms that would be helpful at the touch of a finger:
Resource Check out (books…)Modifications
Subscribe to:
Posts (Atom)