Love Your AirDrop - 10+ Ways to use Airdrop for Efficiency in the Classroom

Just tap Share from various app’s and then select AirDrop.
- Airdrop an assignment you create (I like to create in Google Slides or Notability) and then saved in photos You can screenshot if you create on your iPad or on if you use your computer, here are directions to save a Slide as a JPEG. Student use Edit and Markup (within photos) to complete the assignment (Directions for Photo Mark-up).
- Airdrop a PDF assignment/reading. Student use an app like Notability to complete the assignment or iBooks to save to read anytime.
- AirDrop differentiated assignments quickly to students. Number off students and then have 1’s turn on Airdrop to receive assignment 1...
- Airdrop a Note with a checklist for a project or activities for the day or week.
- Have students AirDrop you their work for quick display on your projector, using your device. (I don’t leave my projector open for students to “take over” so this way I can still quickly display work.)
- Airdrop in-class bucks/award/certificates for good behavior (or warnings for bad behavior)
- Airdrop an image you want students to be able to add into notes (such as notability) to annotate.
- Airdrop a Google Quiz/Google Form
- Airdrop a website
- Airdrop links to games (such quizizz or jeopardy labs) to students who show you satisfactorily completed work.
- Airdrop Bellwork/Jump Start activities as student enter the room.
- Airdrop photos you want to discuss.
- Airdrop your presentation/notes to students.
Additional Thoughts
- No WIFI or it doesn’t work? AirDrop DOES!! It’s a great back-up plan.
- But - Airdrop does make it really easy for students to “share” answers.
- Talk to students about appropriate use of AirDrop and expectations/consequences of cheating
- I tell students it should be turned off, unless I ask them to turn it on. I double check during tests.
- If at at possible make sure student devices are named (or numbered) to know who you are Airdropping.
**Creation Notes**
Creating assignments
I created many of the assignments in Google Slides.
You can then Download as a JPEG or PDF under the File menu.

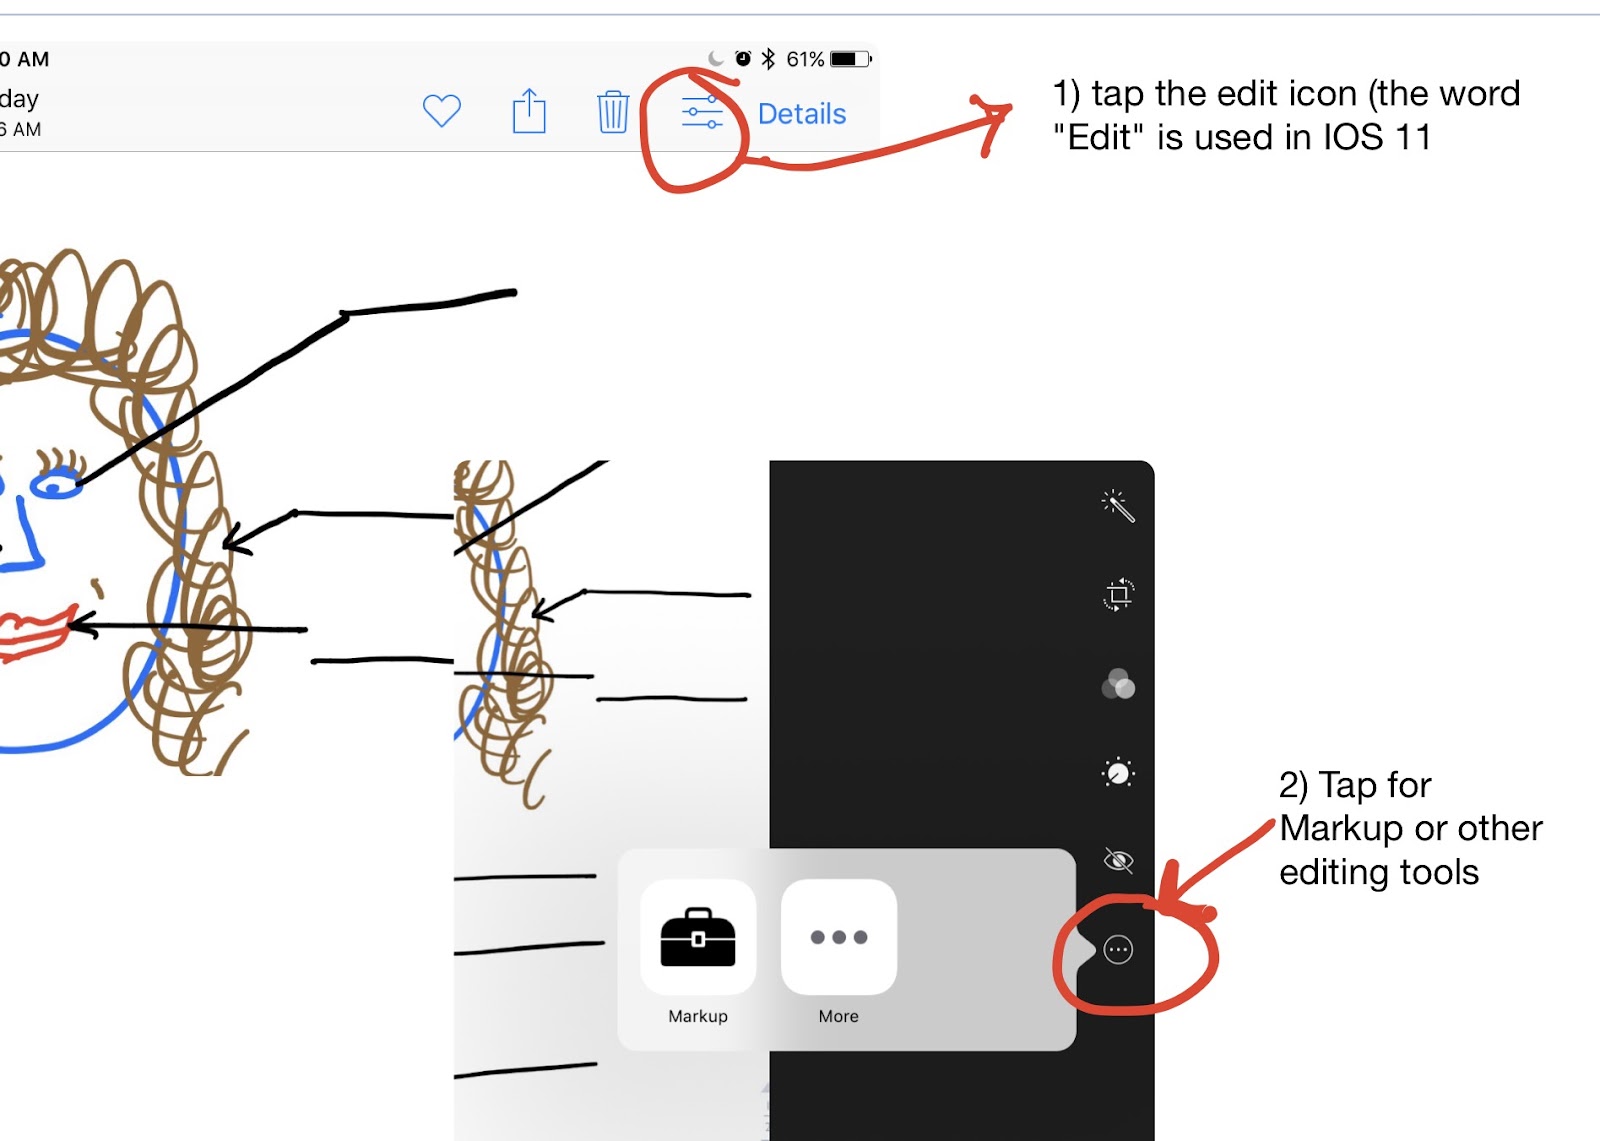
How to use Photo Editing
How to use Photo Editing to complete assignments delivered as a photo.
Airdropping a PDF
From Email - I send the PDF I’ve created on my computer to my own email and open the attachment on my iPad.
My view after opening the attachment, to then AirDrop
Students will receive the PDF and choose how to open it.


From Notability -
From Notability
- Tap the Share Icon
- Tap Other Apps
- Tap Share Note
- Select Airdrop recipients